
การสร้าง Custom Endpoint
นอกจาก single endpoint แล้ว Gato GraphQL ยังรองรับ custom endpoints เพื่อดึงข้อมูลและส่งข้อมูลสำหรับ custom schema (ที่ประกอบด้วยเฉพาะส่วนหนึ่งของ type ที่มีอยู่) และกฎการตรวจสอบผู้ใช้ เพื่อรองรับความต้องการของผู้ใช้และแอปพลิเคชันที่แตกต่างกัน
เราสามารถสร้าง custom endpoints ได้มากเท่าที่ต้องการ
ตัวอย่างเช่น เราสามารถสร้าง custom endpoint สำหรับ:
- ลูกค้าหรือผู้ใช้เฉพาะราย ภายใต้
/graphql/my-client/ - กลุ่มผู้ใช้ที่มีสิทธิ์เข้าถึงฟีเจอร์มากขึ้น (เช่น ผู้ใช้ PRO) ภายใต้
/graphql/pro-users/ - ให้ข้อมูลแก่แอปพลิเคชันมือถือ ภายใต้
/graphql/mobile-app/ - ให้สิทธิ์เข้าถึง API ของบุคคลที่สาม ภายใต้
/graphql/external-api/ - อื่นๆ

การเรียกใช้ custom endpoint จากแอปพลิเคชัน
โปรดทำตามคำแนะนำในคู่มือ การเชื่อมต่อกับ GraphQL server จาก client
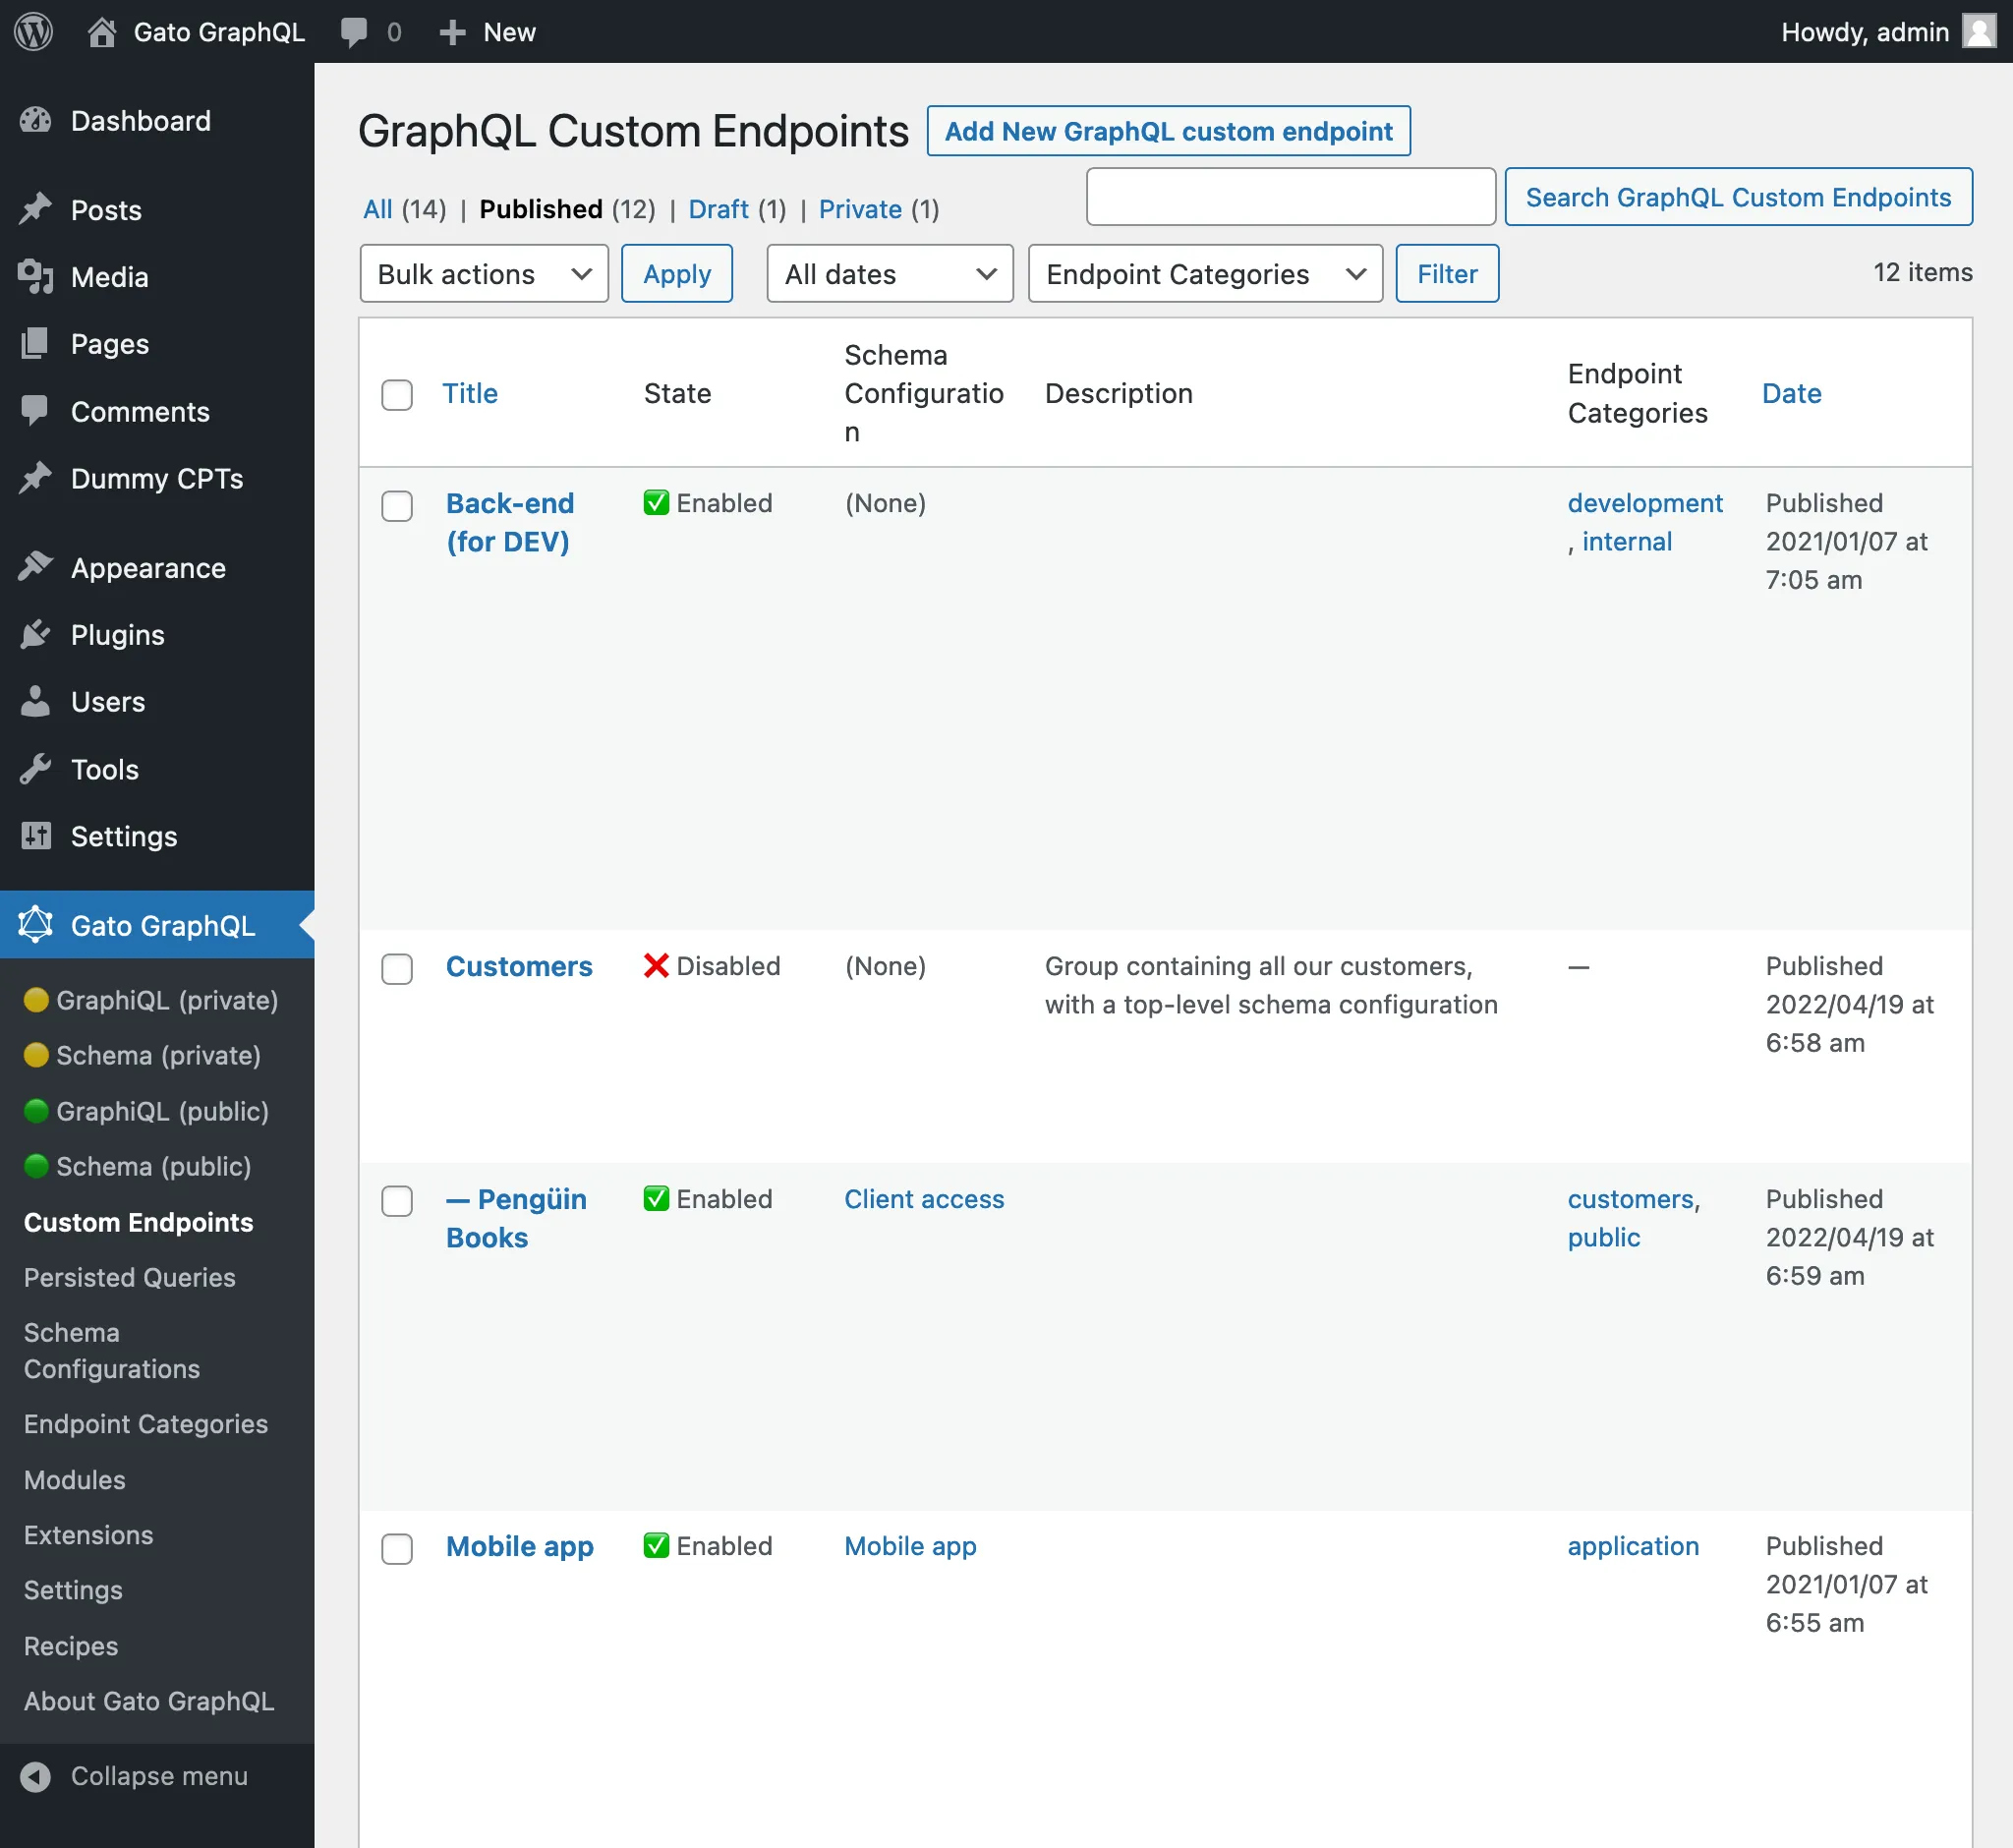
การเข้าถึง custom endpoints ทั้งหมด
การคลิก "Custom Endpoints" ในเมนูของปลั๊กอิน จะแสดงรายการ custom endpoints ทั้งหมดที่สร้างไว้:
การสร้าง custom endpoint ใหม่
คลิกปุ่ม "Add New GraphQL endpoint" เพื่อเปิด WordPress editor:

ตั้งชื่อ ตรวจสอบให้แน่ใจว่า permalink เป็นแบบที่ต้องการ เลือก schema configuration และปรับตั้งค่าต่างๆ เมื่อพร้อมแล้ว คลิกปุ่ม Publish และ custom endpoint จะถูกสร้างขึ้น โดยใช้ permalink ที่กำหนดไว้เป็น URL ของ endpoint
ลิงก์ไปยัง endpoint (รวมถึง source และ clients) จะแสดงในแผง sidebar "Custom Endpoint Overview":

Schema configuration
การกำหนดว่า schema ประกอบด้วยอะไรบ้าง และผู้ใช้จะมีสิทธิ์เข้าถึงอย่างไร จะถูกกำหนดใน schema configuration
ดังนั้น เราต้องสร้าง schema configuration แล้วเลือกจาก dropdown (หรือเลือก none หรือค่าเริ่มต้น):

Private endpoints
การตั้งสถานะของ Custom Endpoint เป็น private จะทำให้เฉพาะผู้ดูแลระบบเท่านั้นที่สามารถเข้าถึง endpoint ได้ ซึ่งป้องกันไม่ให้ข้อมูลของเราถูกแชร์โดยไม่ตั้งใจกับผู้ใช้ที่ไม่ควรมีสิทธิ์เข้าถึง
ตัวอย่างเช่น เราสามารถสร้าง Custom Endpoints แบบ private เพื่อช่วยจัดการแอปพลิเคชัน เช่น การดึงข้อมูลเพื่อสร้างรายงานเกี่ยวกับ metrics ของเรา

Password-protected endpoints
หากเราสร้าง Custom Endpoint สำหรับลูกค้าเฉพาะราย เราสามารถกำหนดรหัสผ่านให้กับ endpoint นั้นได้ เพื่อเพิ่มระดับความปลอดภัย ให้เฉพาะลูกค้ารายนั้นเท่านั้นที่สามารถเข้าถึง endpoint ได้

เมื่อเข้าถึง endpoint ที่มีการป้องกันด้วยรหัสผ่านเป็นครั้งแรก (ไม่ว่าจะเข้าถึง endpoint โดยตรง หรือผ่าน GraphiQL หรือ Interactive Schema clients) จะพบหน้าจอที่ขอรหัสผ่าน:

เมื่อใส่รหัสผ่านและผ่านการตรวจสอบแล้ว ผู้ใช้จึงจะสามารถเข้าถึง endpoint หรือ client ที่ต้องการได้:

การสร้าง endpoint hierarchy
โปรดอ่านคำแนะนำใน การสร้าง API hierarchy
การปิดการใช้งาน custom endpoint
ในตัวเลือก ตั้ง "Enabled" เป็น false เพื่อปิดการใช้งาน custom endpoint
ฟีเจอร์นี้มีประโยชน์เมื่อต้องการให้ custom endpoint เป็นส่วนหนึ่งของ API hierarchy เพื่อให้พฤติกรรมร่วมกับ custom endpoints ลูก โดยไม่จำเป็นต้องถูกเรียกใช้เอง
การเพิ่มคำอธิบายให้ custom endpoint
ใช้ฟิลด์ "Excerpt" จากแผง Document settings เพื่อเพิ่มคำอธิบายให้กับ custom endpoint
ดูข้อมูลเพิ่มเติมในคู่มือ การเพิ่มคำอธิบายให้กับ API
Endpoint clients
custom endpoint แต่ละรายการมี clients ของตัวเองสำหรับการโต้ตอบ
GraphiQL client
เพิ่ม ?view=graphiql ต่อท้าย endpoint เพื่อเข้าถึง GraphiQL client:

GraphiQL client ยังสามารถเปิดได้เมื่อแก้ไข Custom Endpoint ผ่านแผง sidebar "Custom Endpoint Overview":

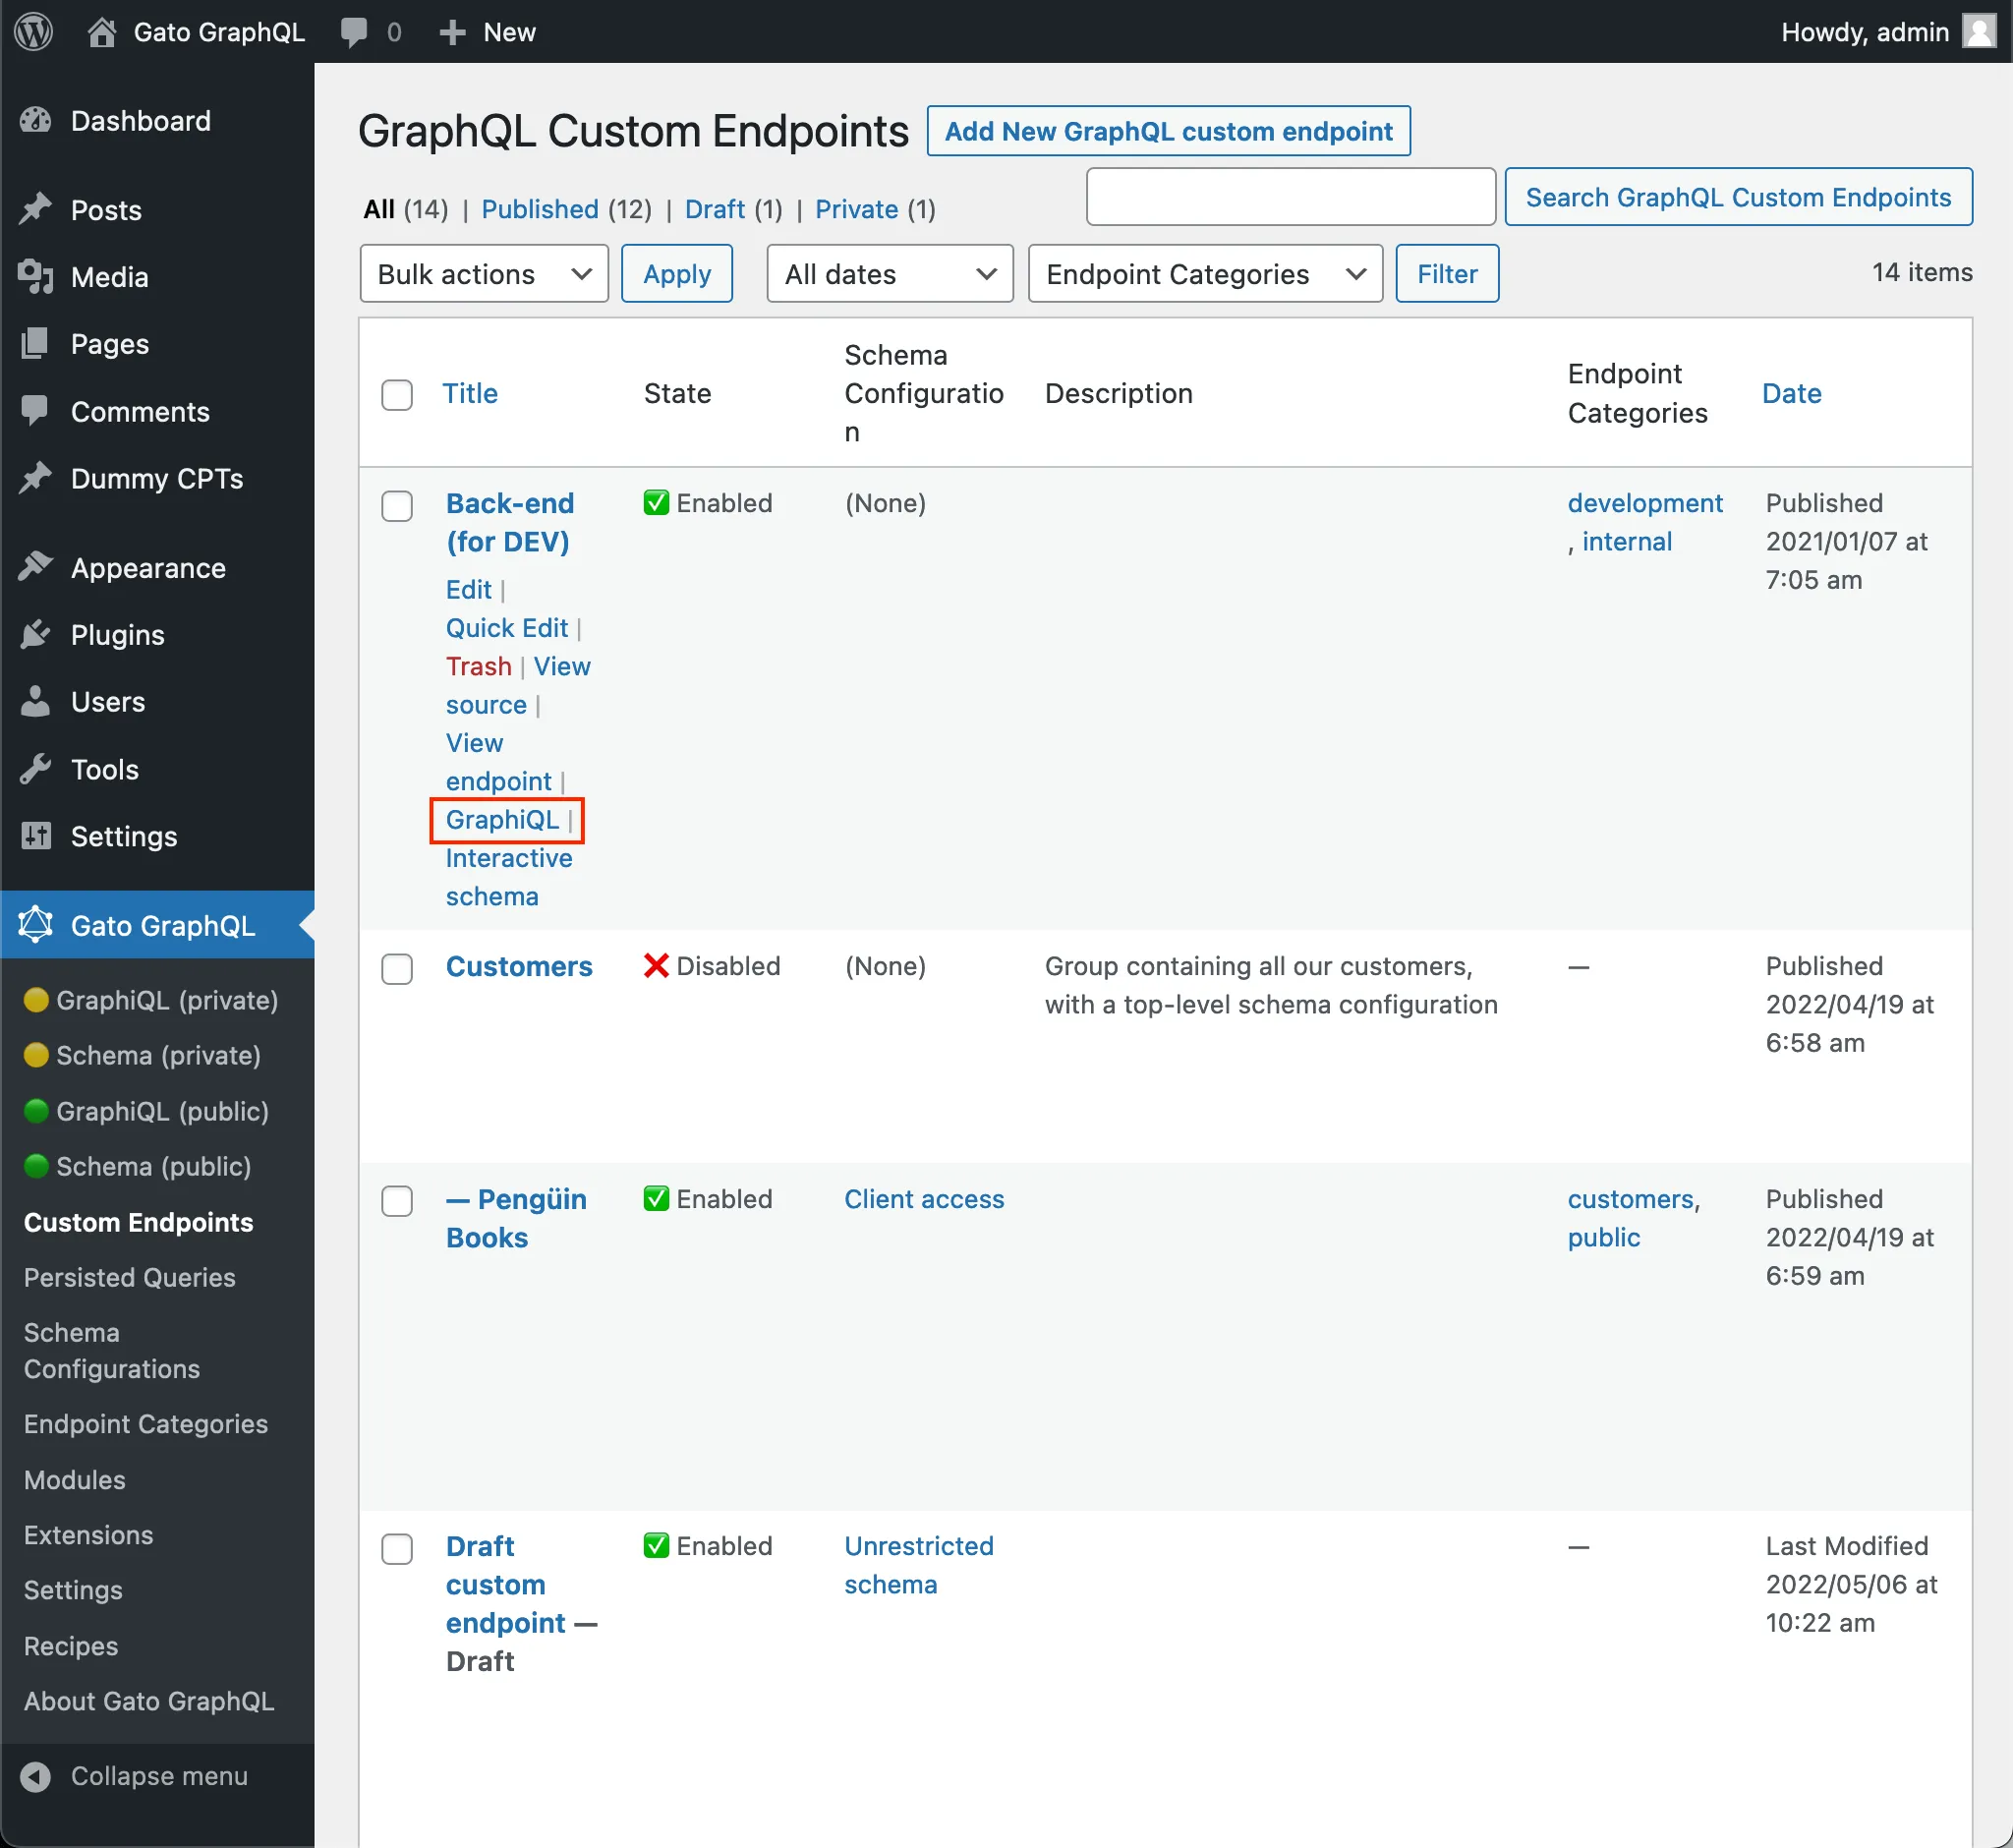
เช่นเดียวกัน client สามารถเปิดได้จากหน้ารายการ Custom Endpoints โดยคลิกลิงก์ "GraphiQL" เมื่อวางเมาส์บนรายการนั้น:
หากต้องการปิดการใช้งาน GraphiQL client ให้ตั้งค่าตัวเลือก "Expose GraphiQL client?" เป็น false ใน Custom Endpoint editor
Interactive Schema (Voyager) client
เพิ่ม ?view=schema ต่อท้าย endpoint เพื่อเข้าถึง Interactive Schema client สำหรับการแสดงภาพและโต้ตอบกับ schema ของ endpoint:

Interactive Schema client ยังสามารถเปิดได้เมื่อแก้ไข Custom Endpoint ผ่านแผง sidebar "Custom Endpoint Overview":

เช่นเดียวกัน client สามารถเปิดได้จากหน้ารายการ Custom Endpoints โดยคลิกลิงก์ "Interactive Schema" เมื่อวางเมาส์บนรายการนั้น:

หากต้องการปิดการใช้งาน Interactive Schema client ให้ตั้งค่าตัวเลือก "Expose the Interactive Schema client?" เป็น false ใน Custom Endpoint editor
การทดสอบ endpoint ก่อนเผยแพร่
custom endpoint ที่มีสถานะ draft หรือ pending จะสามารถใช้ได้เฉพาะผู้ใช้ที่เป็น schema editor เท่านั้น ทำให้พวกเขาสามารถ:
- รัน GraphQL queries กับ endpoint นั้น
- เข้าถึง GraphiQL และ Voyager clients ของ endpoint
จากนั้น เราสามารถสร้าง custom endpoint กำหนด Schema Configuration เผยแพร่เป็น draft หรือ pending และทดสอบ (เช่น ตรวจสอบว่ากฎ Access Control เหมาะสม)
เมื่อได้รับการอนุมัติแล้ว จึงตั้งสถานะเป็น publish เพื่อให้ทุกคนสามารถเข้าถึง custom endpoint ได้
การดูข้อมูล source
การเพิ่ม ?view=source ต่อท้าย endpoint จะแสดง configuration ของ endpoint (ตราบใดที่ผู้ใช้ล็อกอินอยู่และ user role มีสิทธิ์เข้าถึง):

การตั้งค่าใน WordPress editor
ต่อไปนี้คือ inputs ในส่วนเนื้อหาของ editor:
| Input | คำอธิบาย |
|---|---|
| Title | ชื่อของ custom endpoint |
| Schema configuration | เลือก schema configuration ที่ใช้กับ custom endpoint จาก dropdown หรือเลือกตัวเลือกใดตัวเลือกหนึ่งเหล่านี้:
|
| Options | ปรับแต่งพฤติกรรมของ custom endpoint:
|
ต่อไปนี้คือ inputs ใน Document settings:
| Input | คำอธิบาย |
|---|---|
| Permalink | endpoint ที่ custom endpoint จะสามารถเข้าถึงได้ |
| Categories | สามารถจัดหมวดหมู่ custom endpoint ได้ เช่น: mobile, app เป็นต้น |
| Excerpt | ใส่คำอธิบายสำหรับ custom endpoint Input นี้จะมีให้เมื่อโมดูล "Excerpt as Description" เปิดใช้งานอยู่ |
| Page attributes | เลือก custom endpoint แม่ Input นี้จะมีให้เมื่อโมดูล "API Hierarchy" เปิดใช้งานอยู่ |