
การเพิ่ม HTTP Caching
เมื่อ queries ถูกรันกับ GraphQL server โดยใช้ GET (แทนที่จะใช้วิธี POST ที่เป็นแบบดั้งเดิมมากกว่า) GraphQL response สามารถถูกแคชได้ทั้งฝั่ง client หรือบนระบบกลางระหว่าง client กับ server (เช่น CDN) โดยอาศัย HTTP caching มาตรฐาน
วิธีนี้ทำงานได้โดยธรรมชาติสำหรับ persisted queries และสำหรับ single endpoint กับ custom endpoints สามารถทำงานได้โดยการเพิ่มพารามิเตอร์ ?query={ GraphQL query } ต่อท้าย endpoint
การตั้งค่าถูกสร้างผ่าน cache control list และส่งมอบให้ endpoint ผ่าน schema configuration
การรัน endpoint ผ่าน GET
Persisted queries เหมาะสมสำหรับการรันผ่าน GET อยู่แล้ว เนื่องจากเก็บ GraphQL query ไว้บน server (กล่าวคือ ไม่จำเป็นต้องส่งใน body ของ request)
แต่สำหรับ single endpoint และ custom endpoints นั้น จะต้องส่ง query ผ่านพารามิเตอร์ ?query=... ที่ต่อท้าย endpoint URL
ตัวอย่างเช่น GraphQL query ต่อไปนี้:
{
posts {
id
title
url
author {
id
name
url
}
}
}...สามารถรันผ่าน GET กับ single endpoint ได้ดังนี้:
https://mysite.com/graphql/?query={ posts { id title url author { id name url } } }
การคำนวณ max-age อัตโนมัติ
ค่า max-age ของ response ถูกคำนวณโดยอัตโนมัติจาก access control lists ที่กำหนดให้กับ endpoint (ผ่าน schema configuration)
ค่านี้คือค่า max-age ที่ต่ำที่สุดจากทุก field และ directive ใน query ที่ร้องขอ หรือ no-store หากเกิดกรณีใดกรณีหนึ่ง ดังนี้:
- มีการรัน mutation
- field หรือ directive ใดมีค่า
max-ageเป็น0 - access control rule ต้องตรวจสอบสถานะผู้ใช้สำหรับ field หรือ directive ใด (ในกรณีนี้ response จะเป็นข้อมูลเฉพาะผู้ใช้ จึงไม่สามารถแคชได้)
ค่า max-age เริ่มต้น
Fields ที่ไม่ได้กำหนดค่า max-age เฉพาะจะใช้ค่าเริ่มต้นที่กำหนดไว้ใน Schema Configuration:

หากไม่ได้ตั้งค่าไว้ จะใช้ค่า max-age เริ่มต้นที่กำหนดในหน้า Settings ใต้แท็บ "Cache Control" ค่านี้คือ 86400 วินาที ซึ่งสามารถแก้ไขได้ใน Settings
ตัวอย่าง
สมมติว่าเรามีการตั้งค่าค่า max-age สำหรับ fields ของ type User ดังนี้:
name=>600url=>30
ดังนั้น response ต่อ query นี้จะมีค่า max-age ตั้งเป็น 86400 (เนื่องจากทั้ง displayName และ email ไม่ได้รับการตั้งค่า จึงใช้ค่าเริ่มต้น):
query {
users {
displayName
email
}
}Response ต่อ query นี้จะมีค่า max-age ตั้งเป็น 30 (ตรงกับ url ซึ่งเป็นค่าต่ำที่สุดจากทุก field ที่ตั้งค่าไว้):
query {
user(by: {id: 1}) {
name
url
}
}Response ต่อ query นี้จะมีค่า max-age ตั้งเป็น no-store (เนื่องจาก field me ต้องการสถานะผู้ใช้):
query {
me {
name
url
}
}Response ต่อ query นี้จะมีค่า max-age ตั้งเป็น no-store (เนื่องจากมีการรัน mutation):
mutation {
createPost {
id
}
}การเข้าถึง cache control lists ทั้งหมด
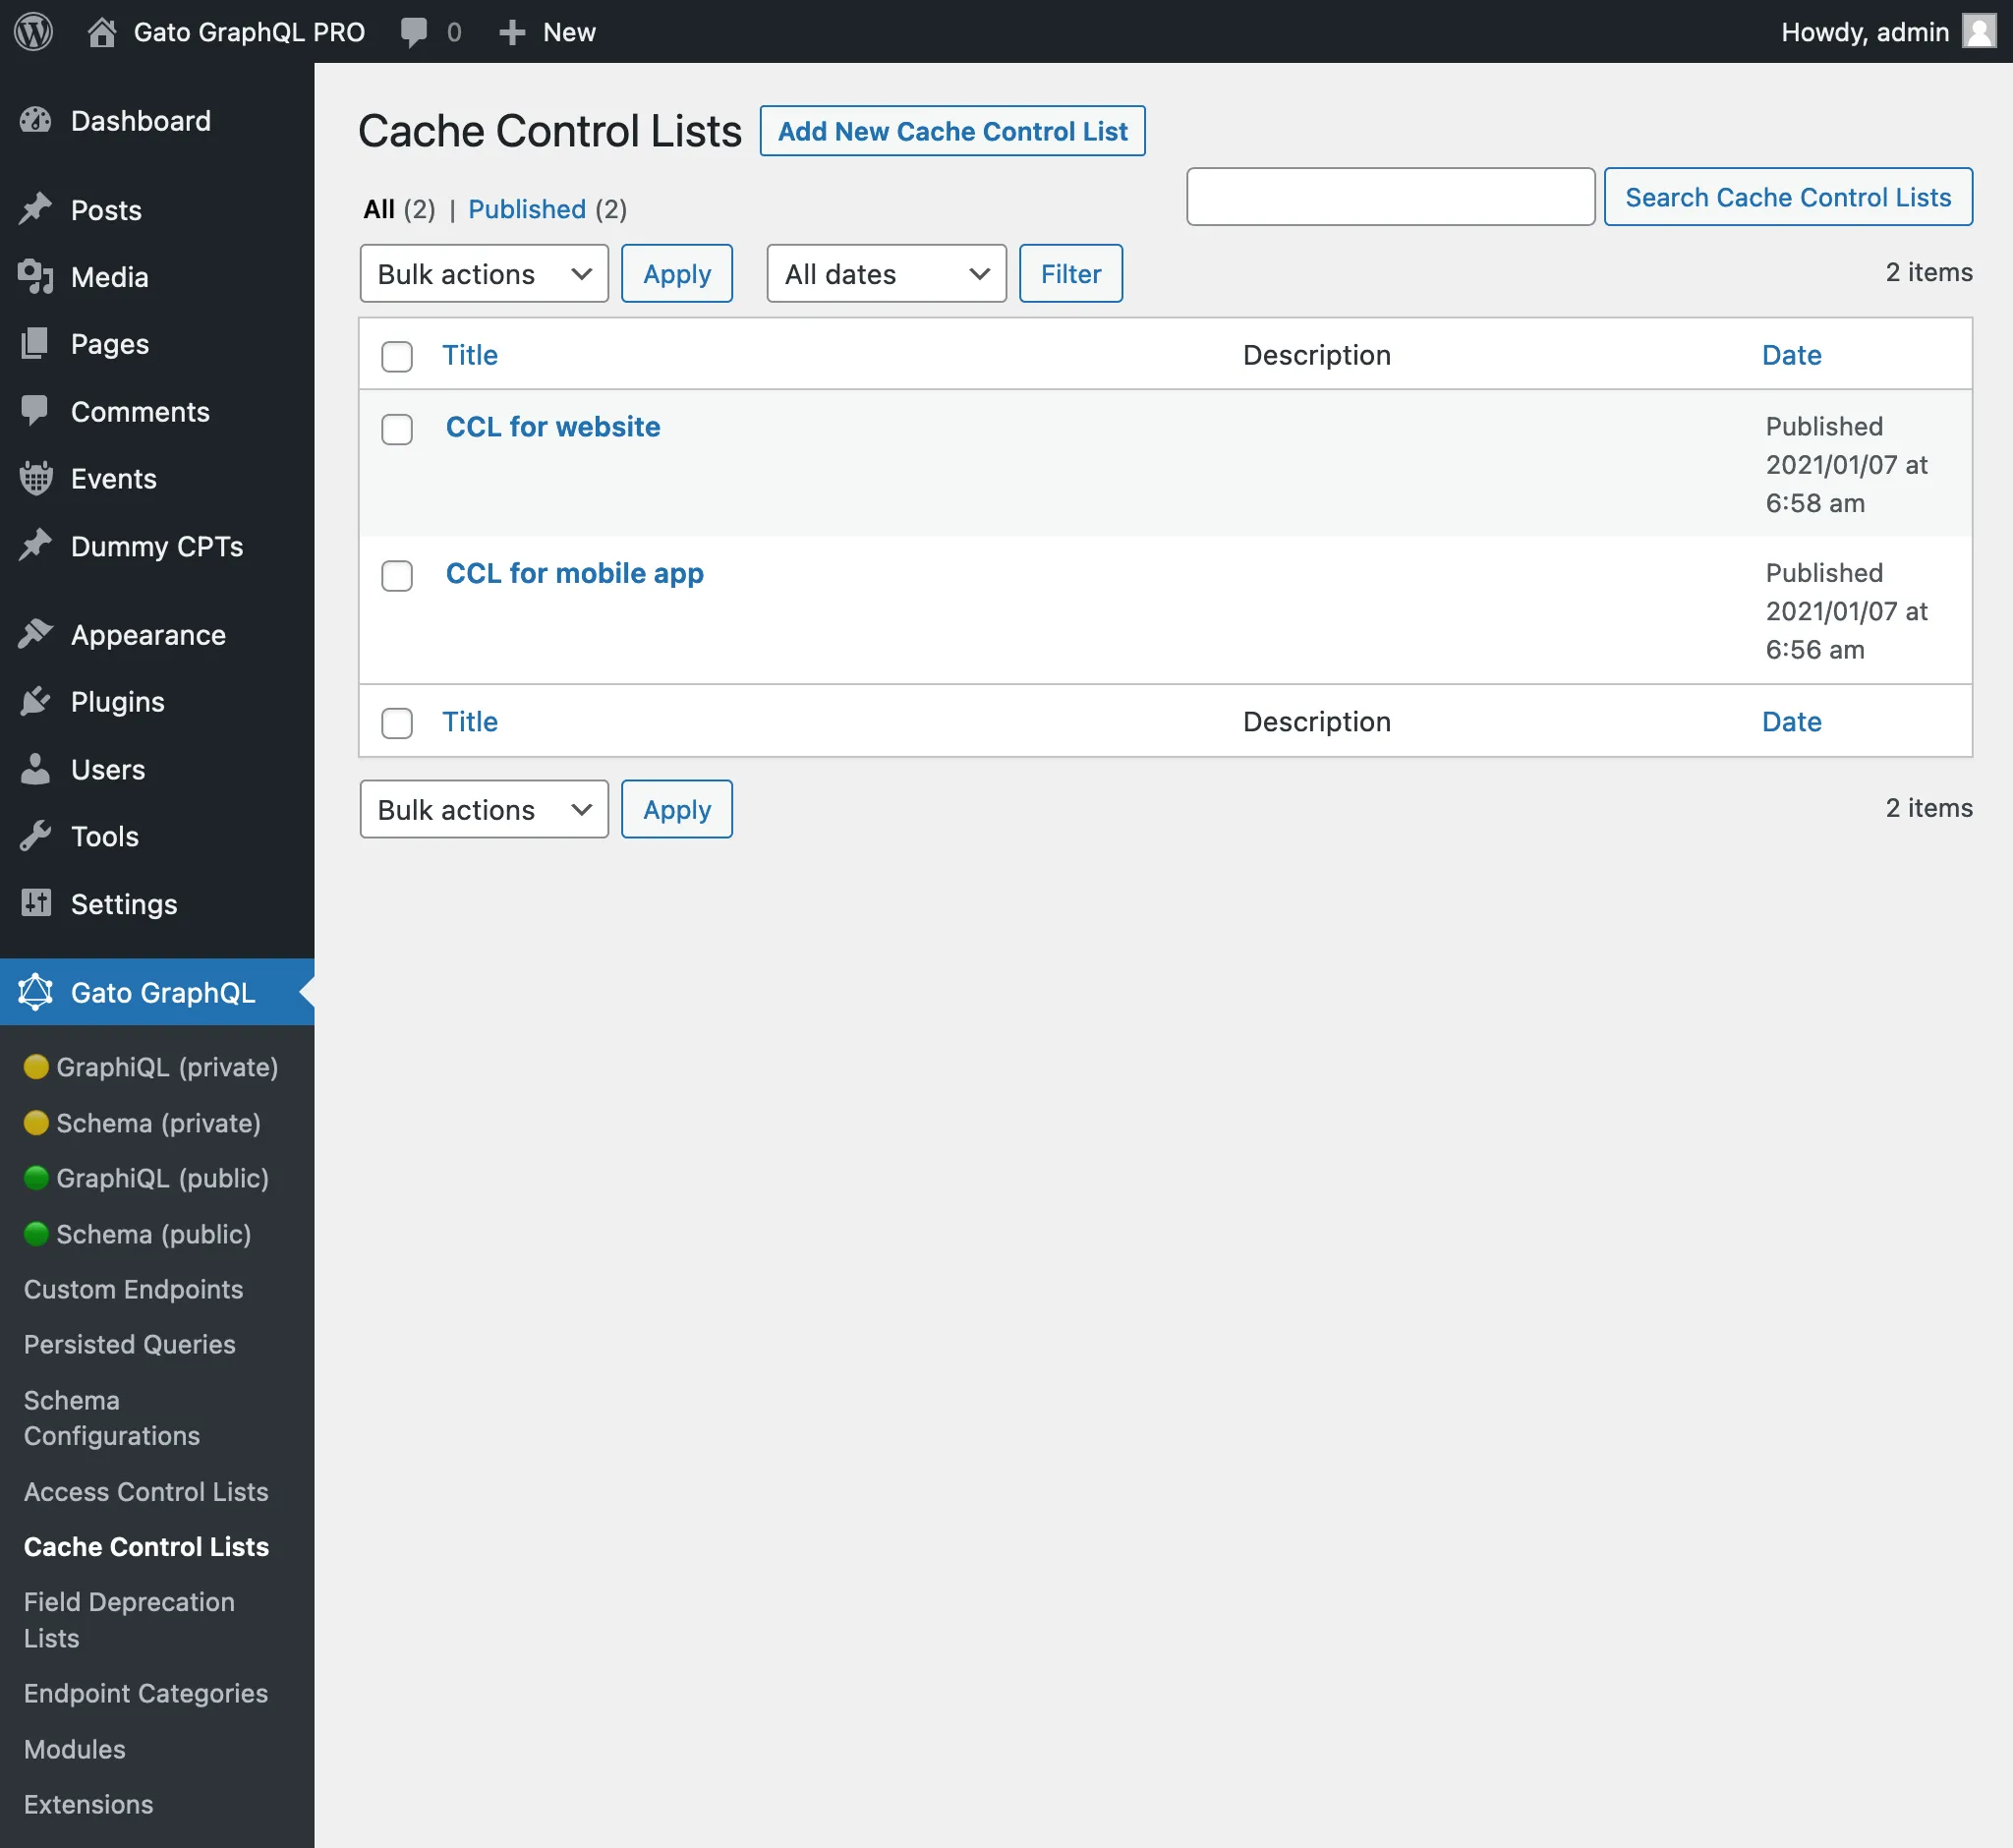
คลิกที่ "Cache Control Lists" ในเมนูของปลั๊กอิน จะแสดงรายการ cache control lists ทั้งหมดที่สร้างไว้:
การสร้าง cache control list ใหม่
คลิกปุ่ม "Add New Cache Control List" เพื่อเปิด WordPress editor:

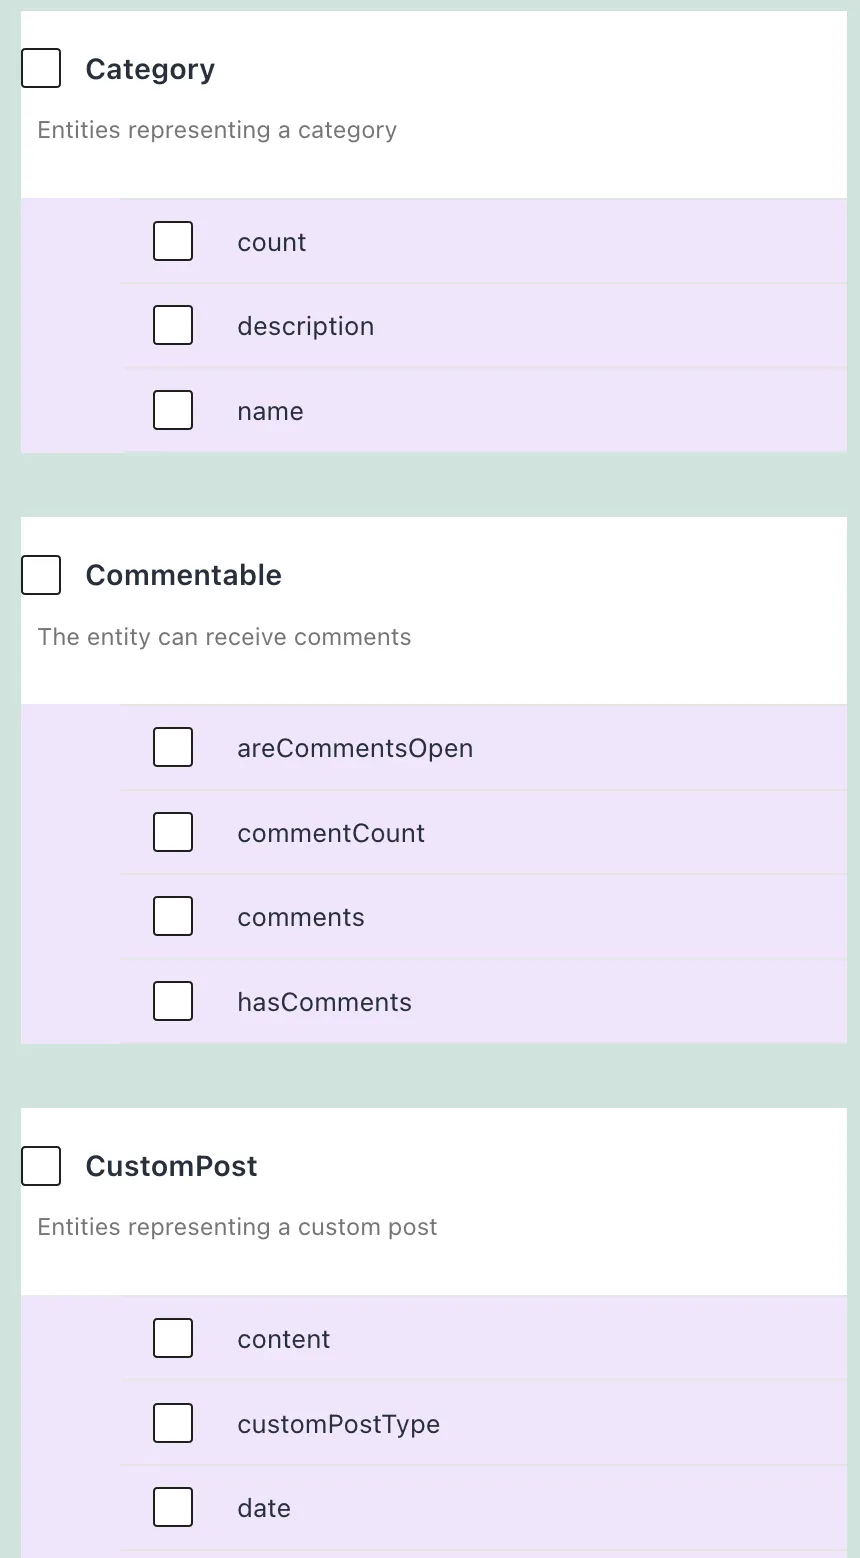
ตั้งชื่อให้ cache control list เพิ่ม entries ที่มี fields และ directives และตั้งค่า max-age สำหรับแต่ละรายการ:

เมื่อพร้อมแล้ว คลิกปุ่ม Publish จากนั้น cache control list ใหม่จะพร้อมใช้งานใน schema configuration
Cache Control entries
ทุก Cache Control List ประกอบด้วย entry หนึ่งรายการขึ้นไป โดยแต่ละรายการมีองค์ประกอบดังนี้:
- Fields ที่ต้องการตั้งค่า caching
- Directives ที่ต้องการตั้งค่า caching
- ค่า
max-ageสำหรับรายการเหล่านั้น

การเลือก fields จาก interfaces
นอกจาก fields จาก types แล้ว เรายังสามารถเลือก fields จาก interfaces ได้ด้วย ในกรณีนี้ ค่า max-age จะถูกนำไปใช้เมื่อ query fields เหล่านั้นจาก type ใดก็ตามที่ implement interface นั้น
การอธิบาย cache control list
ใช้ฟิลด์ "Excerpt" จากแผงการตั้งค่า Document เพื่อเพิ่มคำอธิบายให้กับ cache control list
ดูข้อมูลเพิ่มเติมได้ในคู่มือ การเพิ่มคำอธิบายให้กับ API
การใช้งาน cache control list
หลังจากสร้าง cache control list แล้ว เราสามารถให้ Custom Endpoint หรือ Persisted Query ใช้งานได้โดยแก้ไข Schema Configuration ที่เกี่ยวข้อง และเลือก ACL จากรายการใต้บล็อก "Cache Control Lists"

หากไม่ได้ปรับแต่งการตั้งค่า จะใช้ Cache Control Lists เริ่มต้นที่กำหนดในหน้า Settings ใต้แท็บ "Cache Control":
