
Custom Endpoints
สร้าง schema แบบกำหนดเอง พร้อมกฎการเข้าถึงที่กำหนดเองสำหรับผู้ใช้แต่ละกลุ่ม โดยแต่ละ schema จะเข้าถึงได้ผ่าน endpoint ของตัวเอง
คำอธิบาย
โดยทั่วไป GraphQL server จะเปิดเผย endpoint เดียวสำหรับการดึงและส่งข้อมูล
นอกจากการรองรับ endpoint เดียวแล้ว Gato GraphQL ยังสามารถสร้าง custom endpoint ได้ด้วย โดยให้การกำหนดค่า schema ที่แตกต่างกันเพื่อตอบสนองความต้องการของเป้าหมายต่างๆ เช่น:
- ไคลเอนต์หรือผู้ใช้เฉพาะราย
- กลุ่มผู้ใช้ที่มีสิทธิ์เข้าถึงฟีเจอร์มากกว่า (เช่น ผู้ใช้ PRO)
- หนึ่งในหลายแอปพลิเคชัน เช่น แอปมือถือหรือเว็บไซต์
- API ของบุคคลที่สาม
- อื่นๆ
custom endpoint คือ Custom Post Type และ permalink ของมันคือ endpoint เอง endpoint ที่มีชื่อว่า "My endpoint" และ slug ว่า my-endpoint จะเข้าถึงได้ที่ /graphql/my-endpoint/

ไคลเอนต์
custom endpoint แต่ละรายการมีชุดไคลเอนต์สำหรับการโต้ตอบของตัวเอง:
✅ GraphiQL client เข้าถึงได้ที่ endpoint + ?view=graphiql (เช่น: /graphql/my-endpoint/?view=graphiql)
ต้องเปิดใช้งานโมดูล GraphiQL for Custom Endpoints

✅ Interactive schema client เข้าถึงได้ที่ endpoint + ?view=schema (เช่น: /graphql/my-endpoint/?view=schema)
ต้องเปิดใช้งานโมดูล Interactive Schema for Custom Endpoints

การสร้าง Custom Endpoint
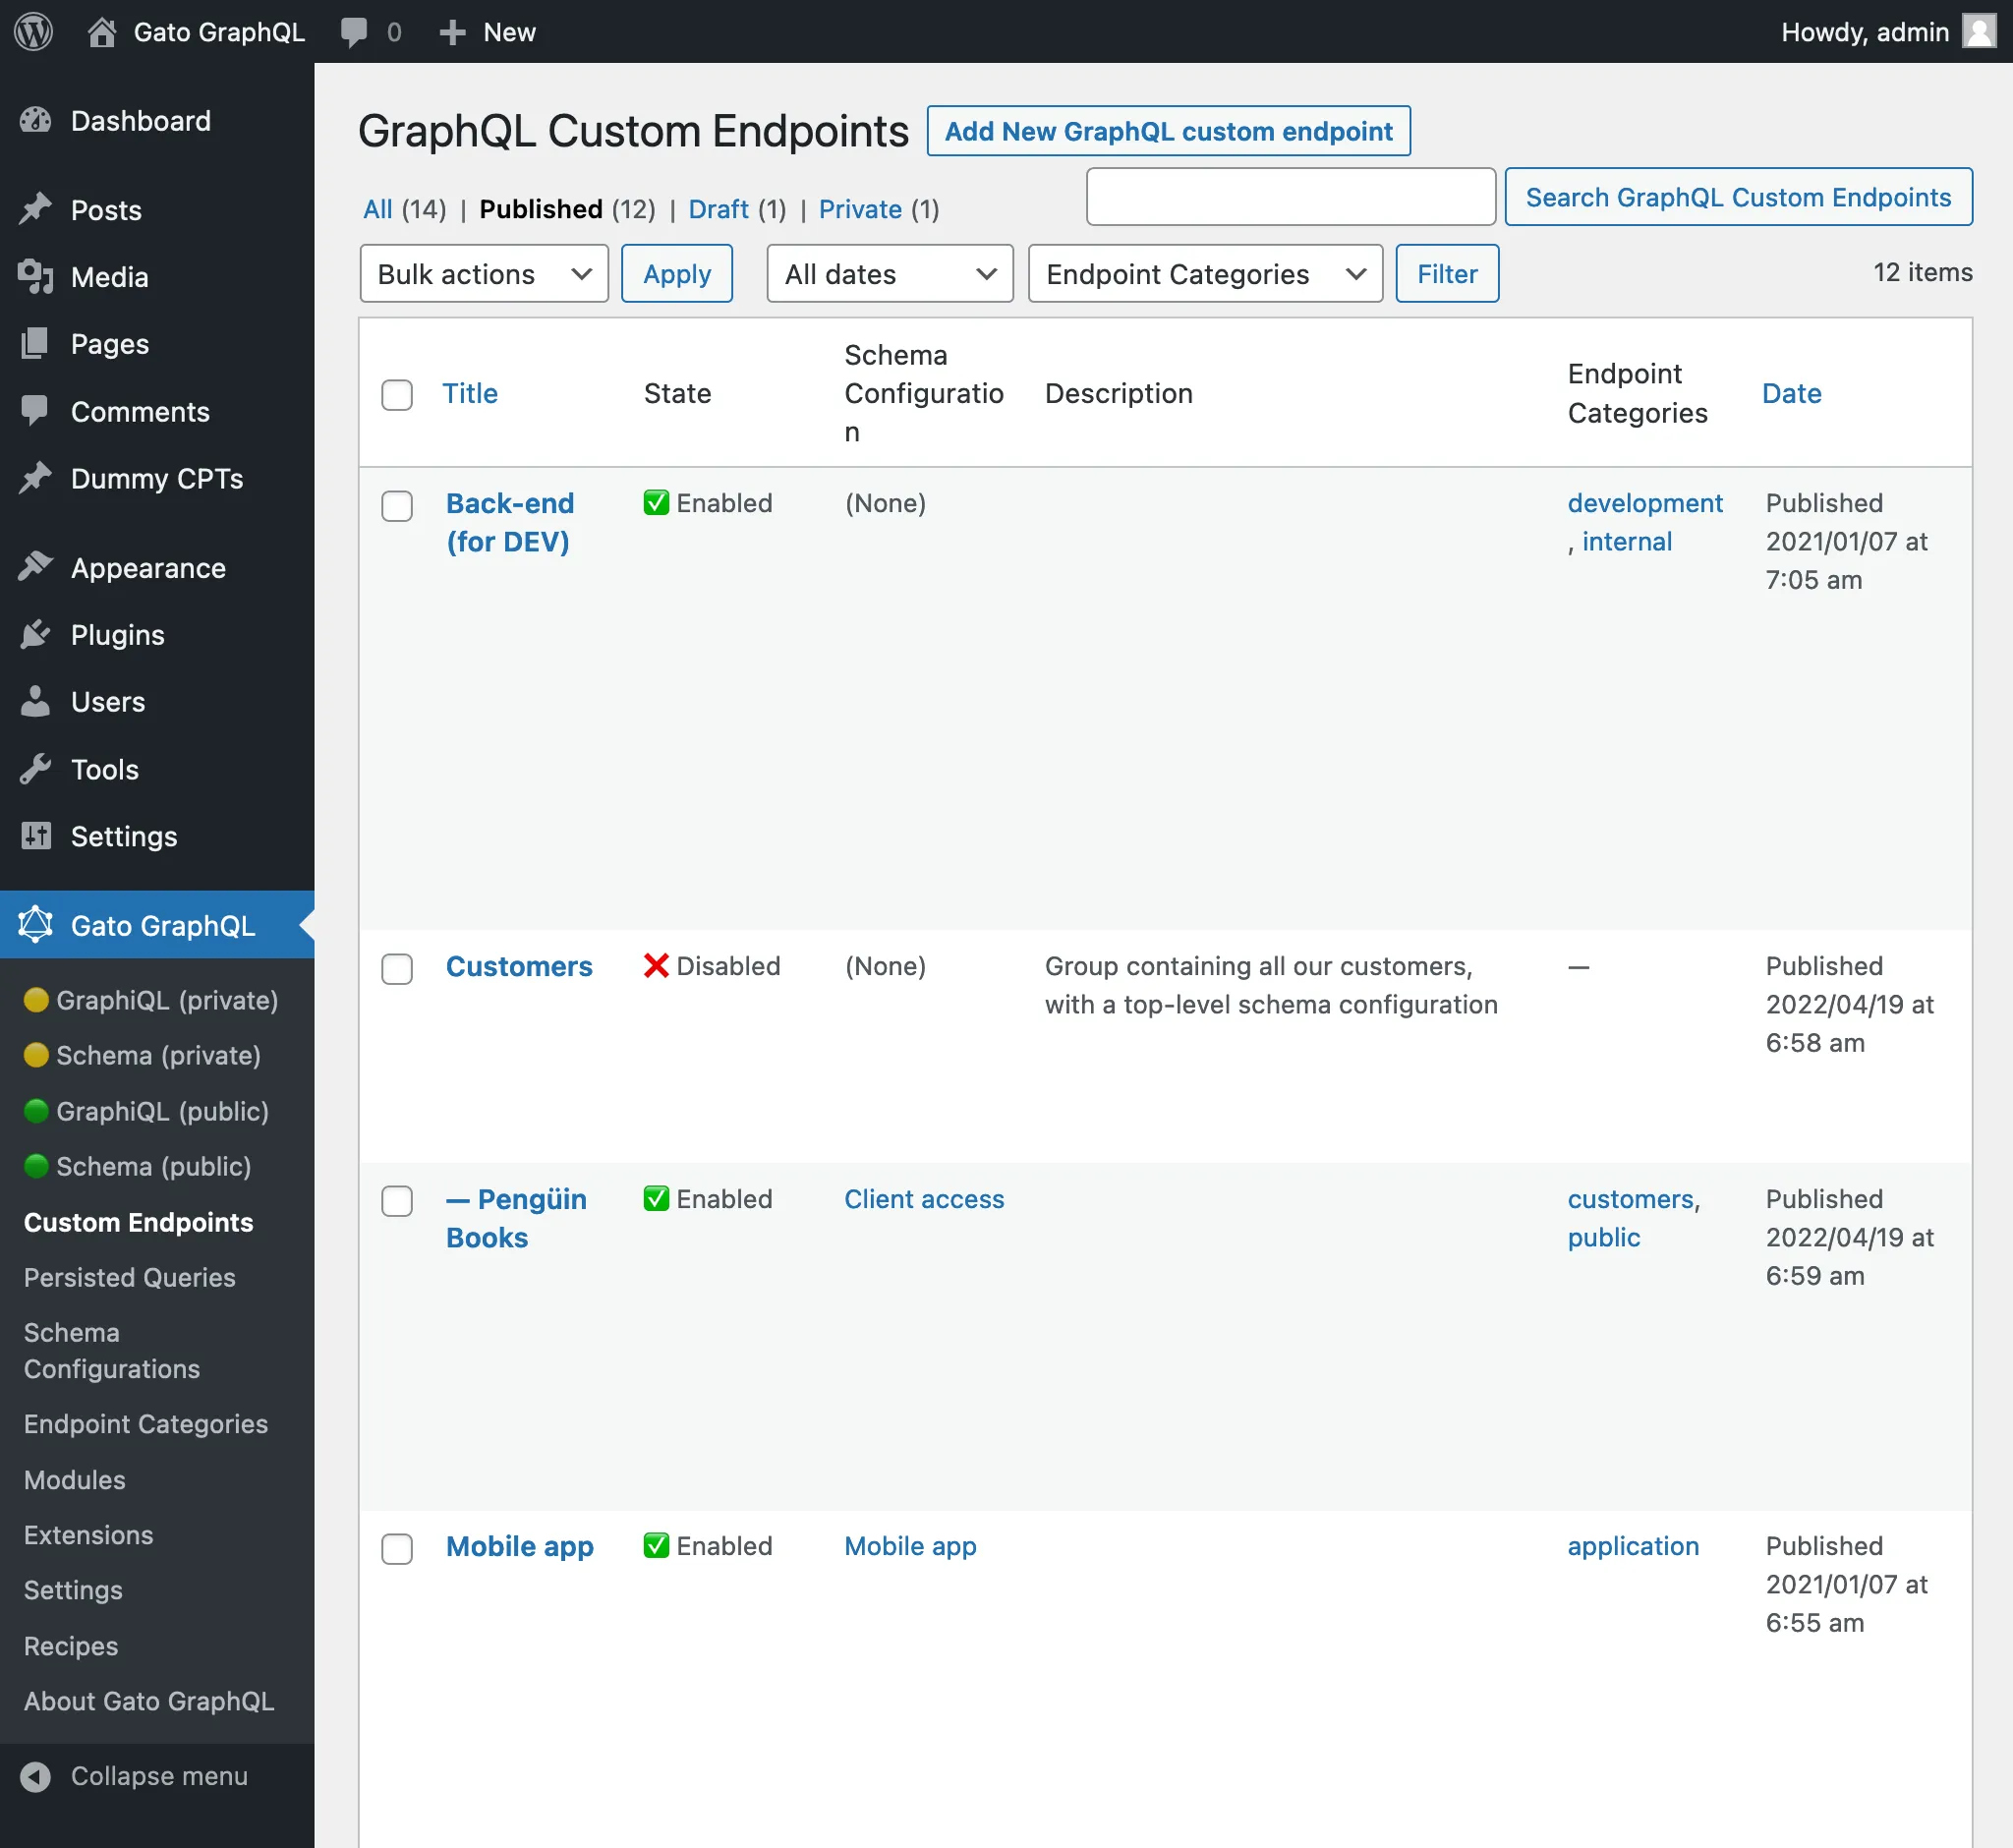
เมื่อคลิกที่ลิงก์ Custom Endpoints ในเมนู จะแสดงรายการ custom endpoint ทั้งหมดที่สร้างไว้:
custom endpoint คือ custom post type (CPT) ในการสร้าง custom endpoint ใหม่ ให้คลิกปุ่ม "Add New GraphQL endpoint" ซึ่งจะเปิด WordPress editor:

เมื่อ custom endpoint พร้อมแล้ว ให้เผยแพร่ และ permalink ของมันจะกลายเป็น endpoint URL ลิงก์ไปยัง endpoint (รวมถึง source และไคลเอนต์) จะแสดงในแผงด้านข้าง "Custom Endpoint Overview":

การเพิ่ม ?view=source ต่อท้าย permalink จะแสดงการกำหนดค่าของ endpoint (ตราบใดที่ผู้ใช้เข้าสู่ระบบและ role ของผู้ใช้มีสิทธิ์เข้าถึง):

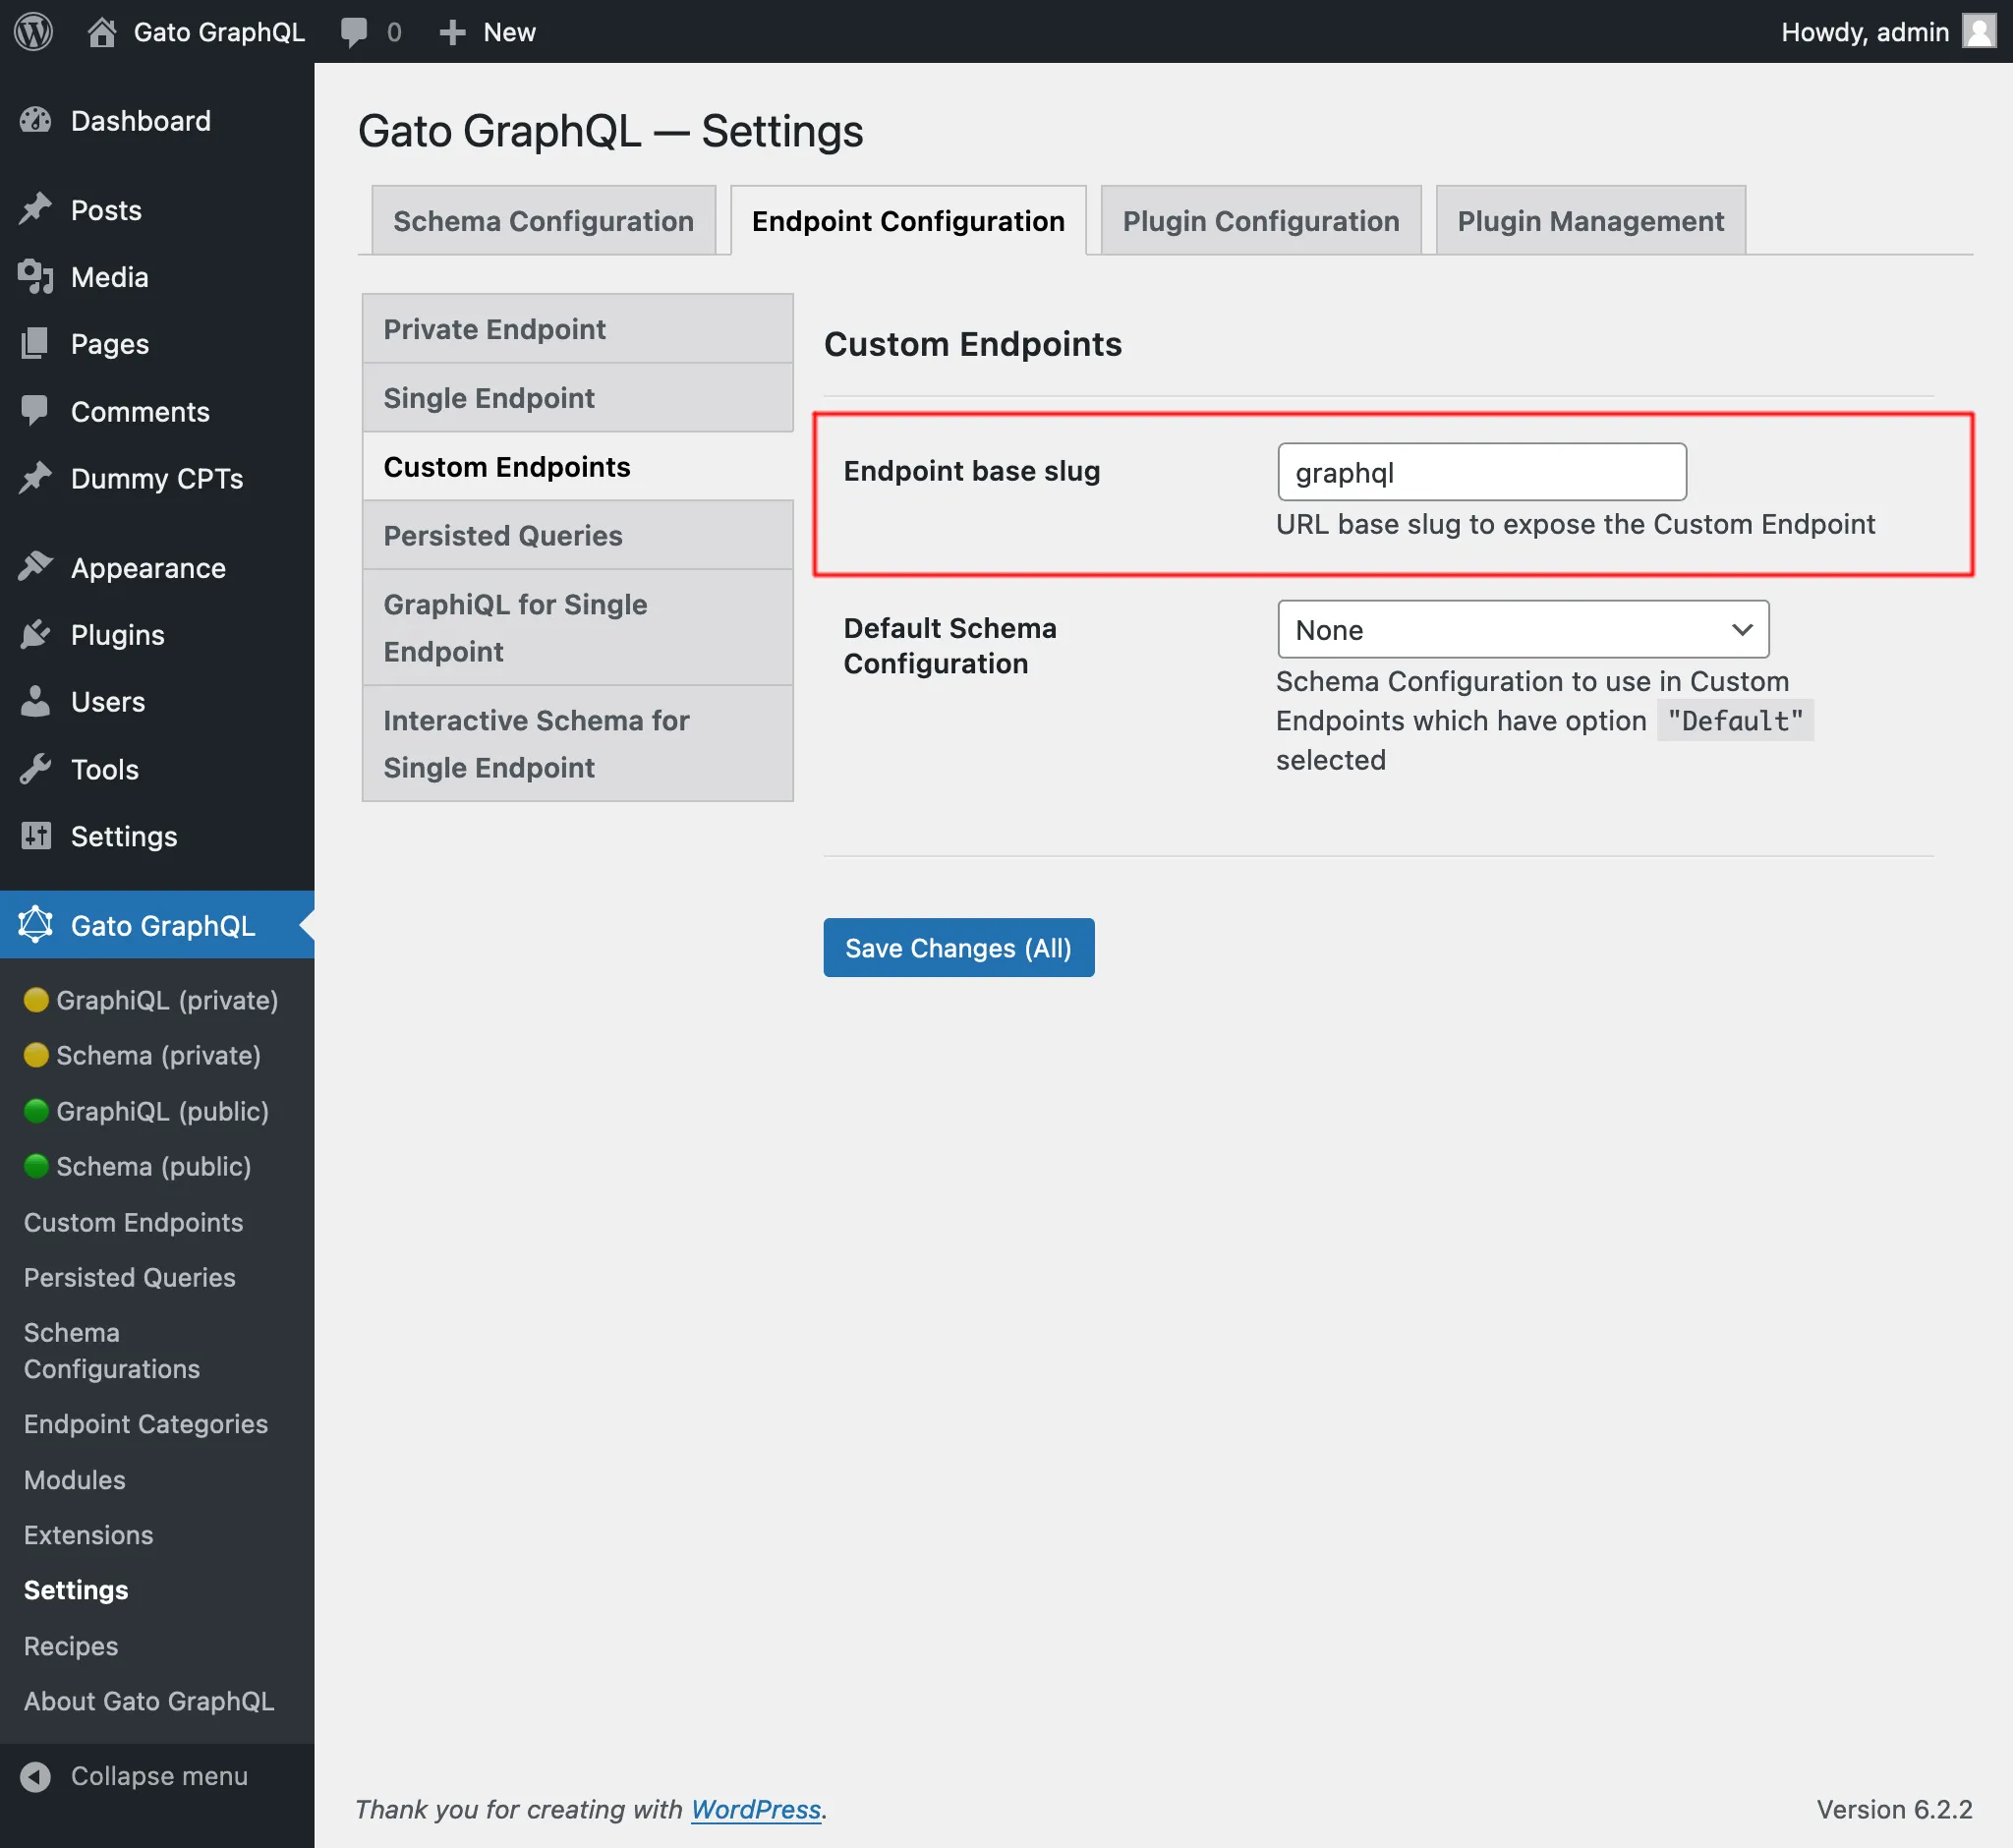
ตามค่าเริ่มต้น custom endpoint จะมี path /graphql/ และสามารถกำหนดค่านี้ได้ผ่านการตั้งค่า:
การกำหนดค่า Schema
การกำหนดว่า schema ประกอบด้วยองค์ประกอบใด และผู้ใช้จะมีสิทธิ์เข้าถึงอย่างไร จะถูกกำหนดใน schema configuration
ดังนั้นเราต้องสร้าง schema configuration ก่อน แล้วจึงเลือกจาก dropdown:

การจัดระเบียบ Custom Endpoints ตามหมวดหมู่
ในแผงด้านข้าง "Endpoint categories" เราสามารถเพิ่มหมวดหมู่เพื่อช่วยจัดการ Custom Endpoint:
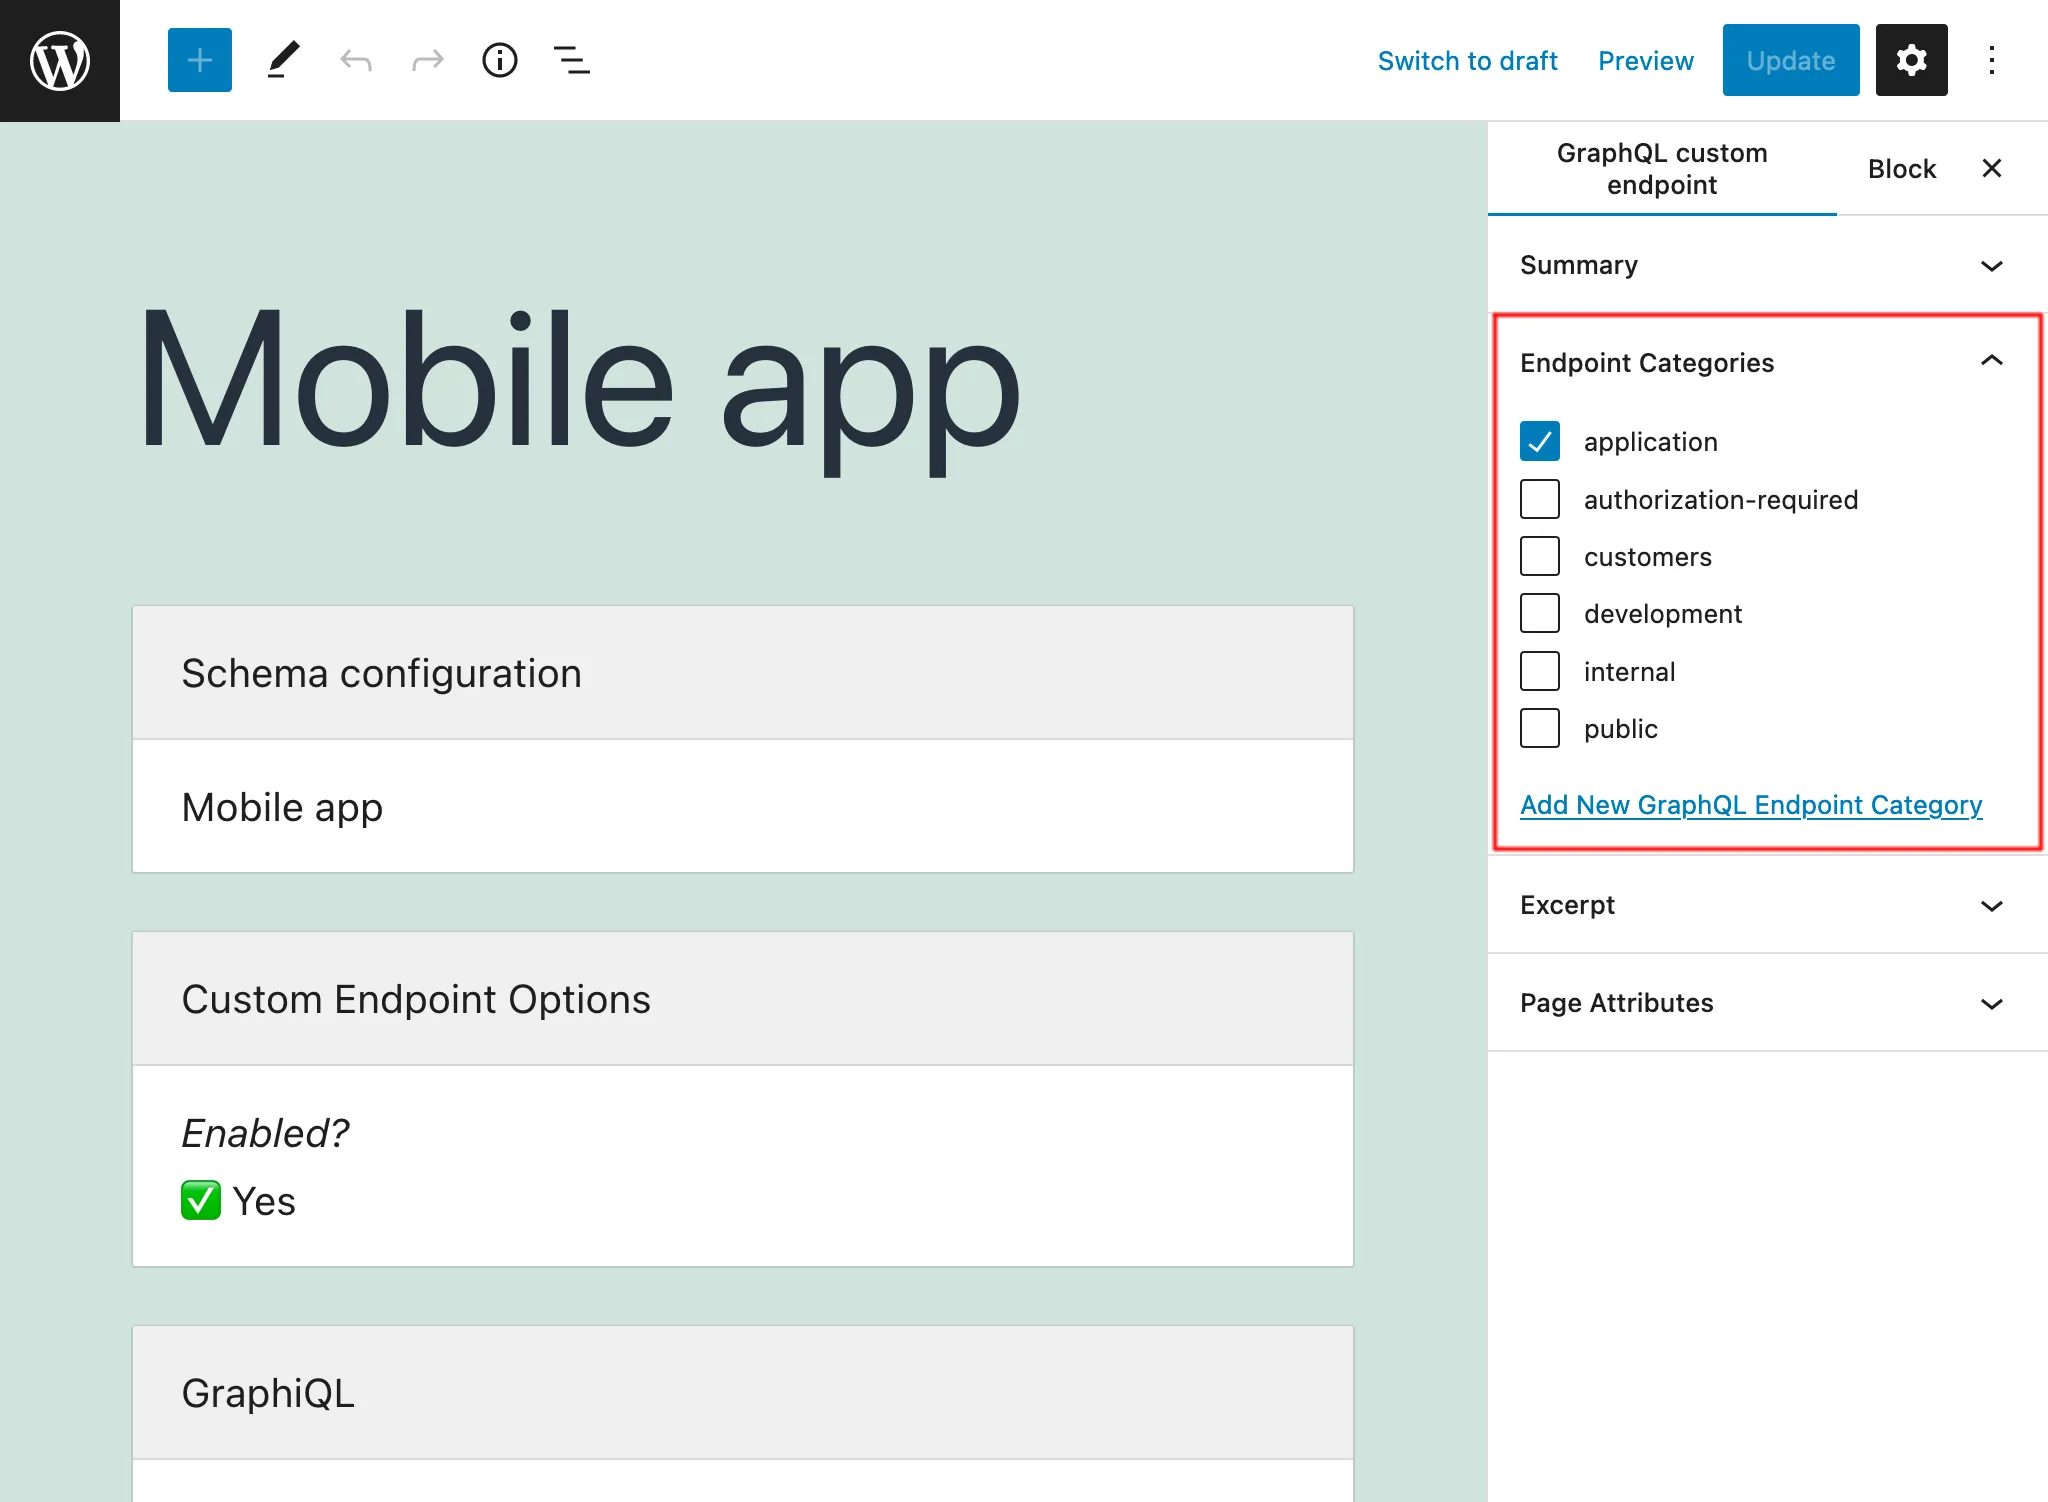
ตัวอย่างเช่น เราสามารถสร้างหมวดหมู่เพื่อจัดการ endpoint ตามไคลเอนต์ แอปพลิเคชัน หรือข้อมูลที่จำเป็นอื่นๆ:

ในรายการ Custom Endpoints เราสามารถดูหมวดหมู่ของแต่ละรายการได้ และเมื่อคลิกลิงก์หมวดหมู่ใดๆ หรือใช้ตัวกรองที่ด้านบน จะแสดงเฉพาะรายการในหมวดหมู่นั้น:


Private endpoints
การตั้งค่าสถานะของ Custom Endpoint เป็น private ทำให้ endpoint นั้นเข้าถึงได้เฉพาะผู้ดูแลระบบเท่านั้น ซึ่งป้องกันไม่ให้ข้อมูลของเราถูกแชร์กับผู้ใช้ที่ไม่ควรเข้าถึงข้อมูลโดยไม่ตั้งใจ
ตัวอย่างเช่น เราสามารถสร้าง Custom Endpoints แบบ private เพื่อช่วยจัดการแอปพลิเคชัน เช่น การดึงข้อมูลเพื่อสร้างรายงานพร้อมเมตริกต่างๆ

Password-protected endpoints
หากเราสร้าง Custom Endpoint สำหรับไคลเอนต์เฉพาะราย เราสามารถกำหนดรหัสผ่านให้กับมันได้ เพื่อเพิ่มระดับความปลอดภัยที่ทำให้เฉพาะไคลเอนต์รายนั้นเท่านั้นที่สามารถเข้าถึง endpoint ได้

เมื่อเข้าถึง endpoint ที่ป้องกันด้วยรหัสผ่านเป็นครั้งแรก (ไม่ว่าจะเข้าถึง endpoint โดยตรง หรือผ่านไคลเอนต์ GraphiQL หรือ Interactive Schema) จะพบหน้าจอที่ขอรหัสผ่าน:

เมื่อป้อนและตรวจสอบรหัสผ่านแล้วเท่านั้น ผู้ใช้จึงจะสามารถเข้าถึง endpoint หรือไคลเอนต์ที่ต้องการได้:
